LPC2148 Keil Setup for .hex file
In this tutorial we will see how to setup a keil project to generate .hex file for LPC2148

Keil Setup Steps
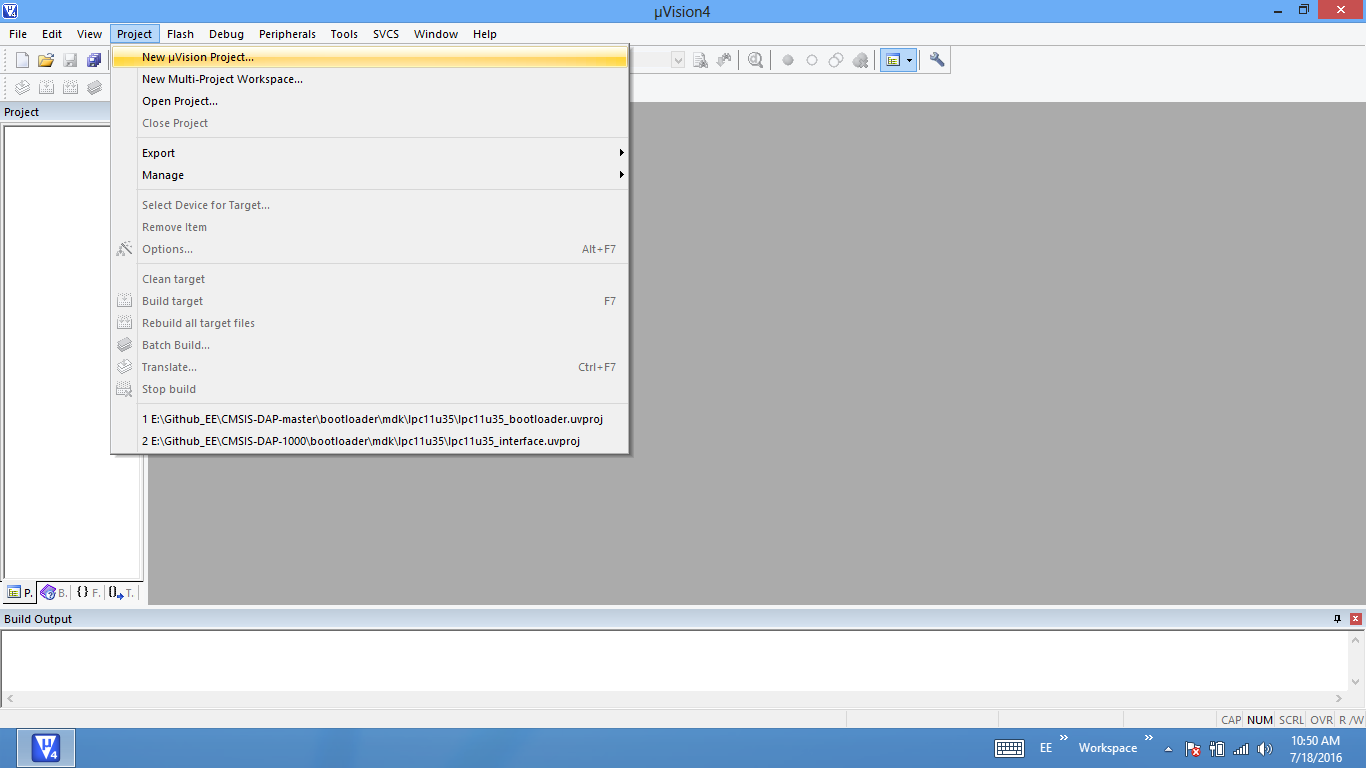
Step1: Open the Keil software and select the New Microvision project from Project Menu as shown below.
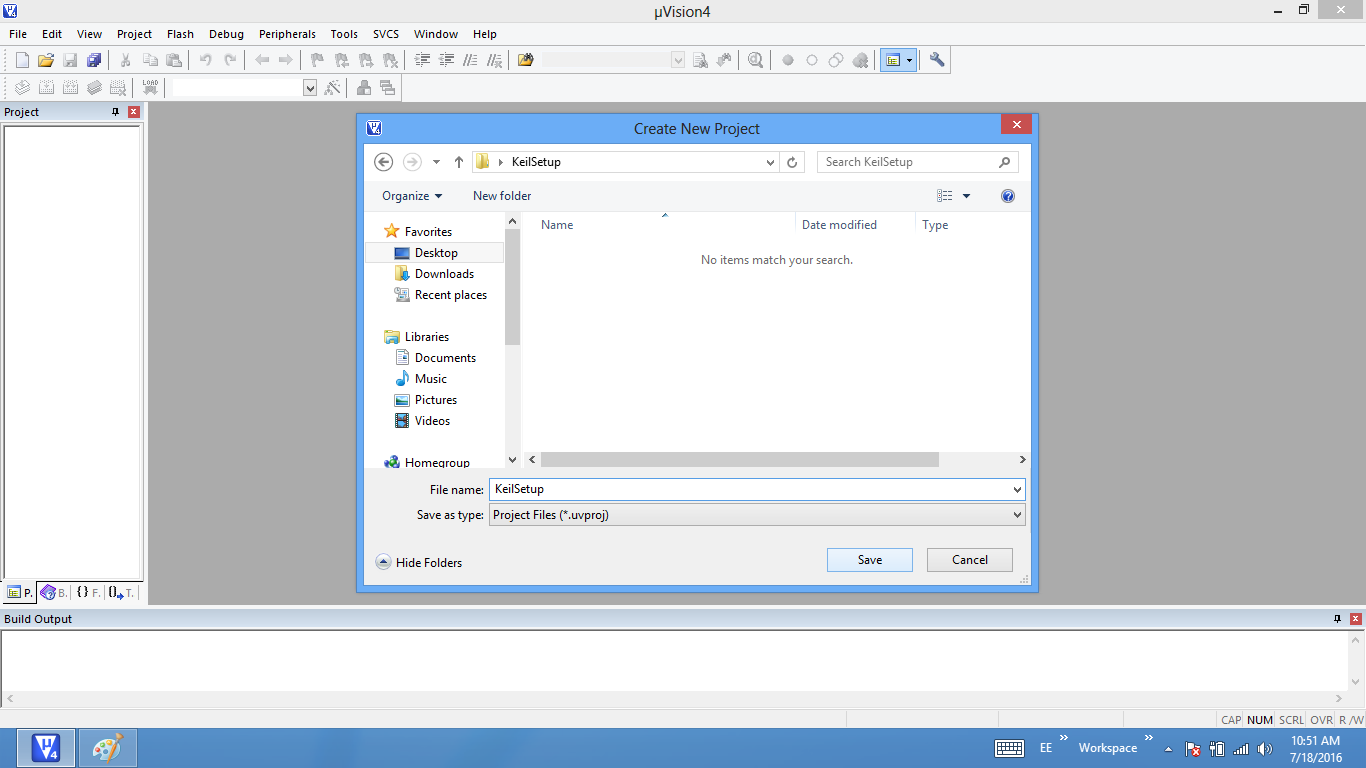
Step2: Browse to your project folder and provide the project name and click on save.
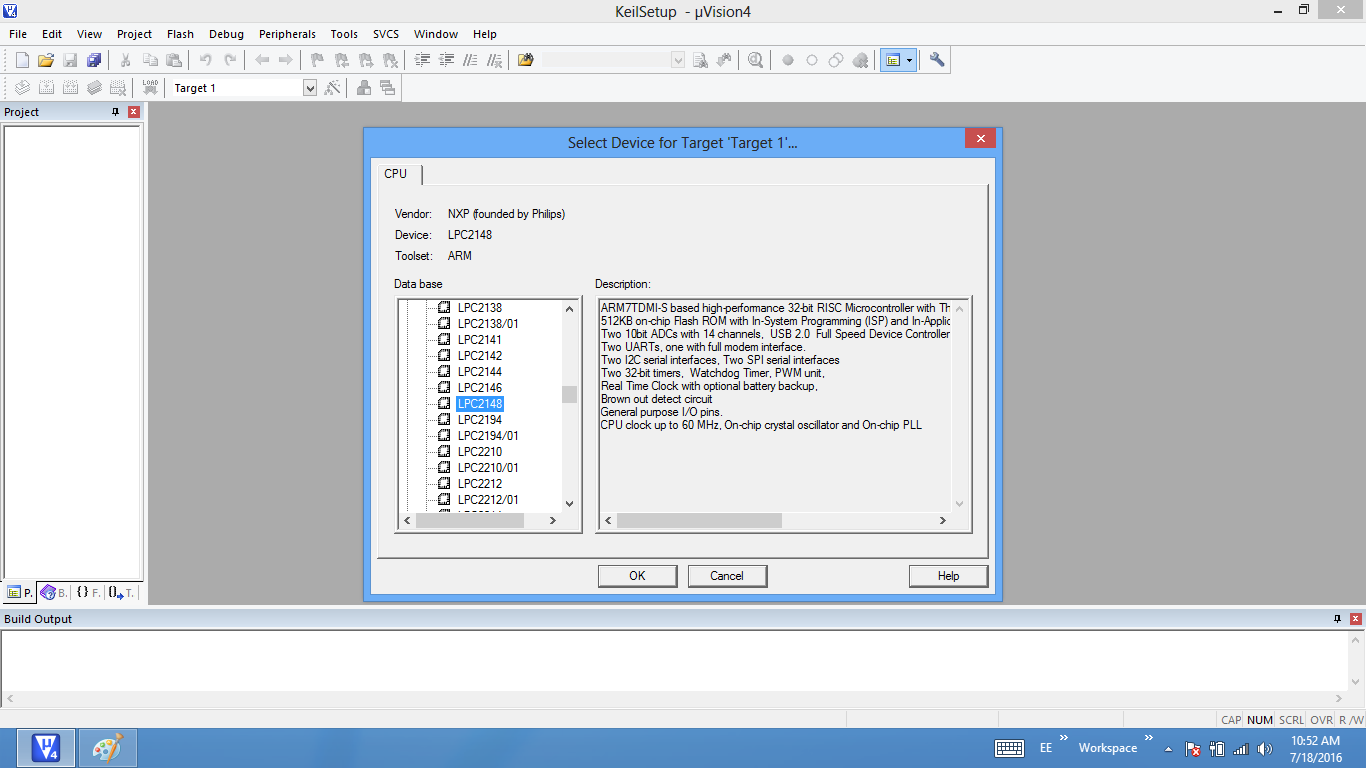
Step3: Once the project is saved a new pop up “Select Device for Target” opens, Select the controller(NXP:LPC2148) and click on OK.
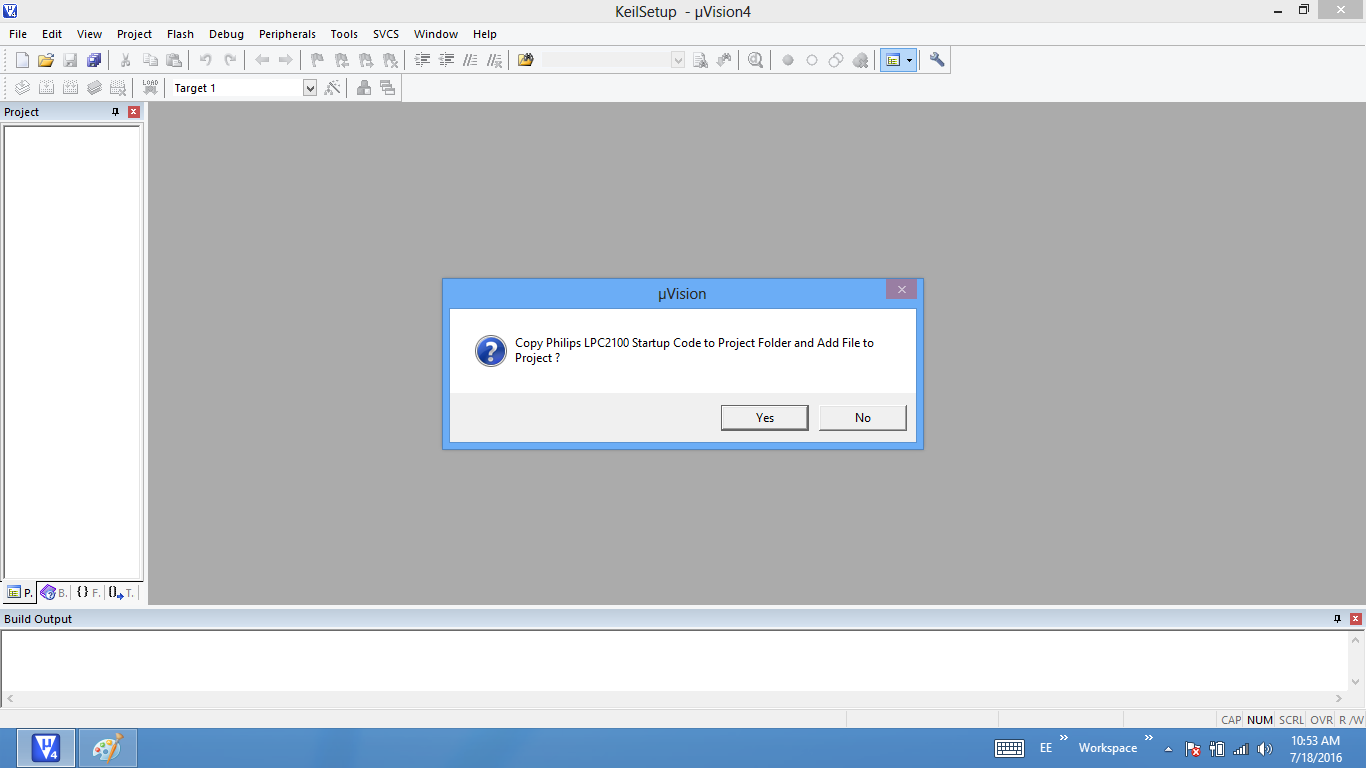
Step4: As LPC2148 needs the startup code, click on Yes option to include the Startup file.
Step5: Create a new file to write the program.
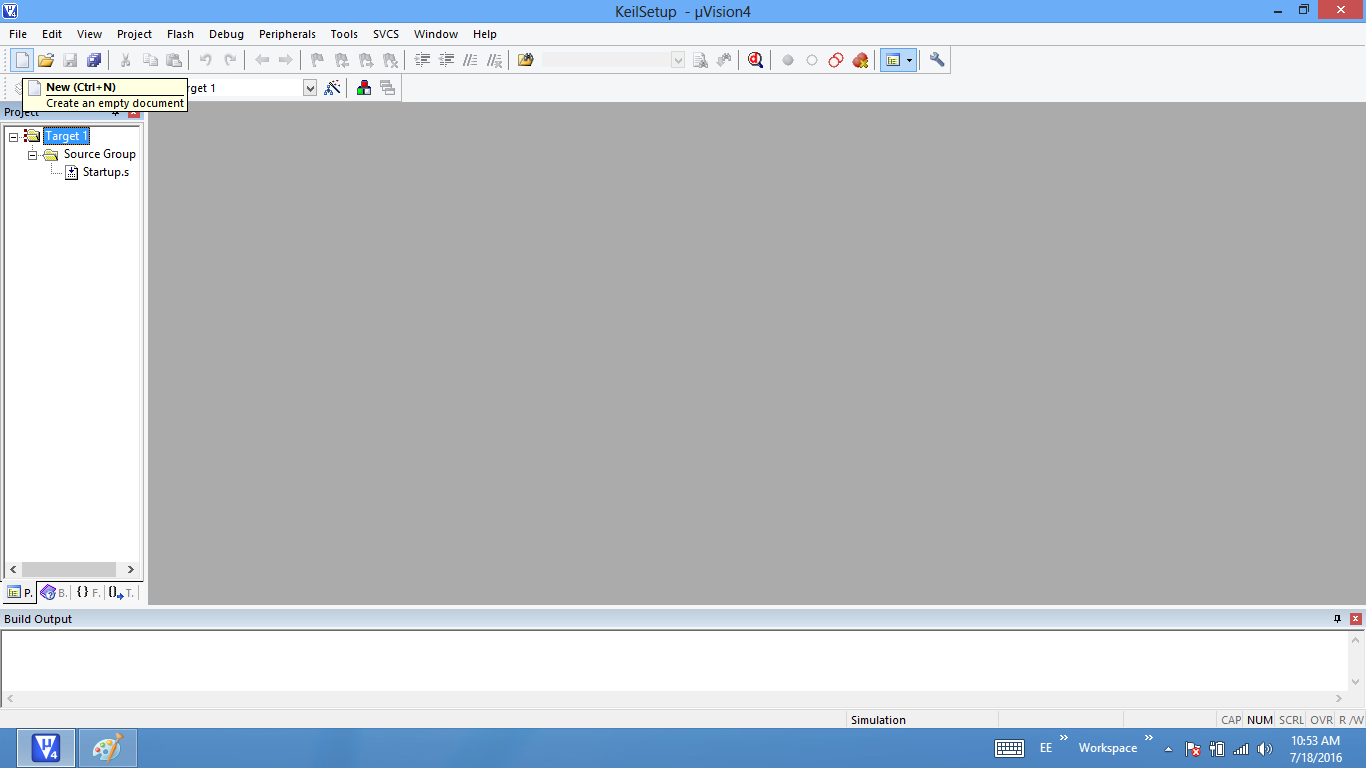
Step6: Type the code or Copy paste the below code snippet.
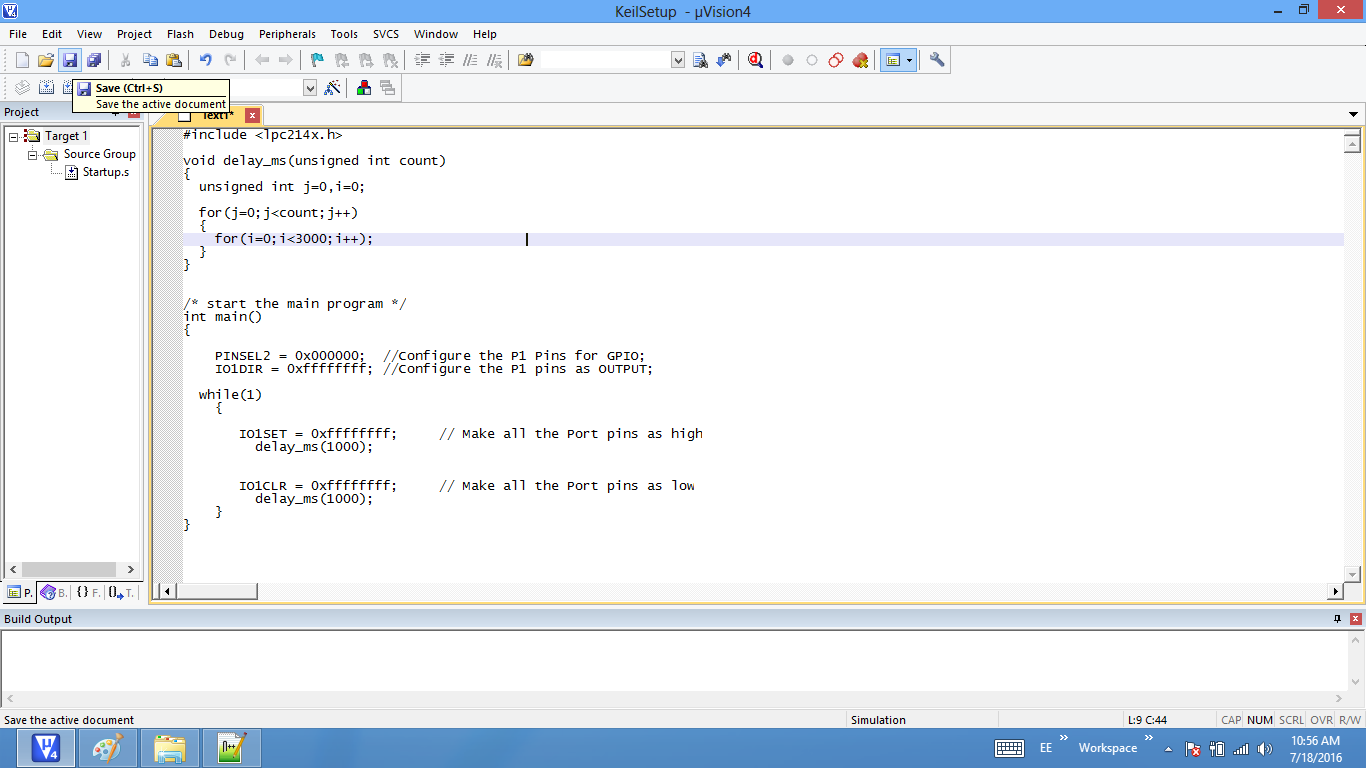
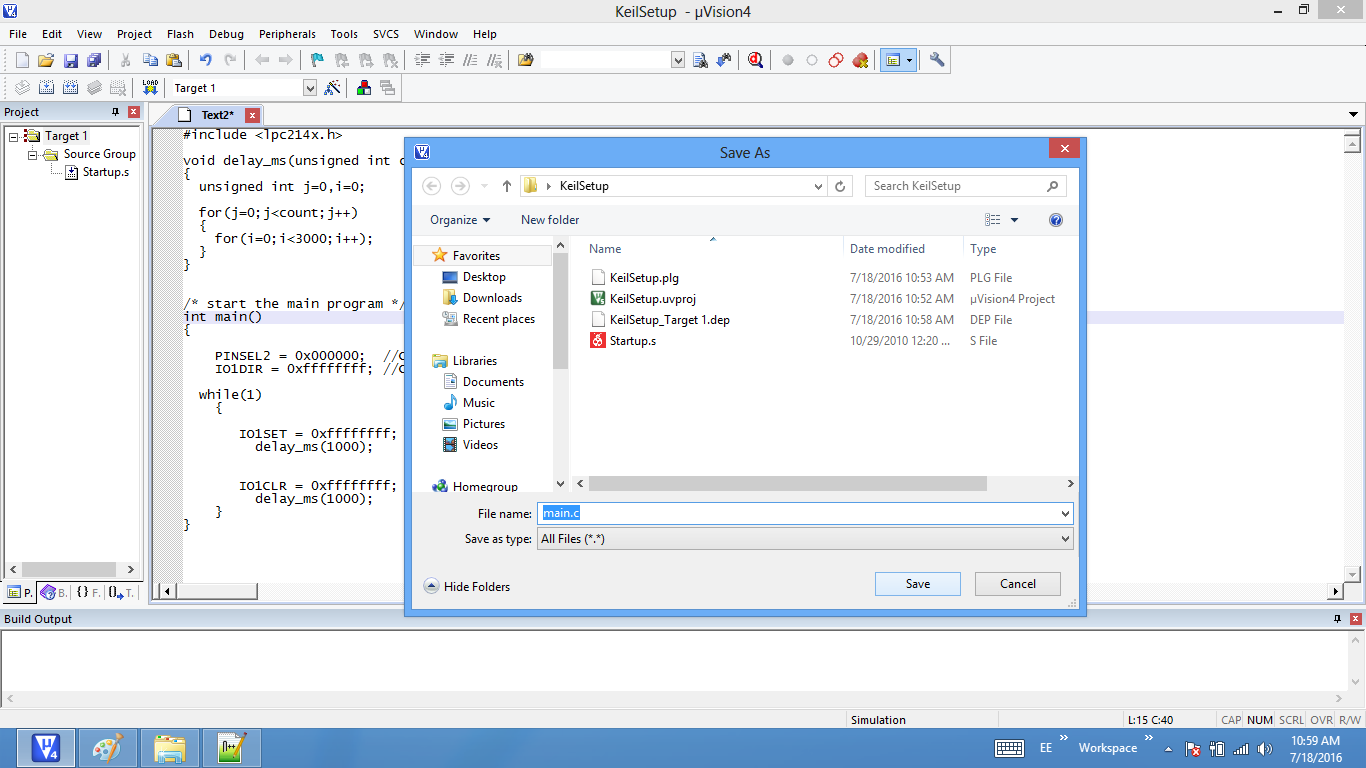
Step7: After typing the code save the file as main.c.
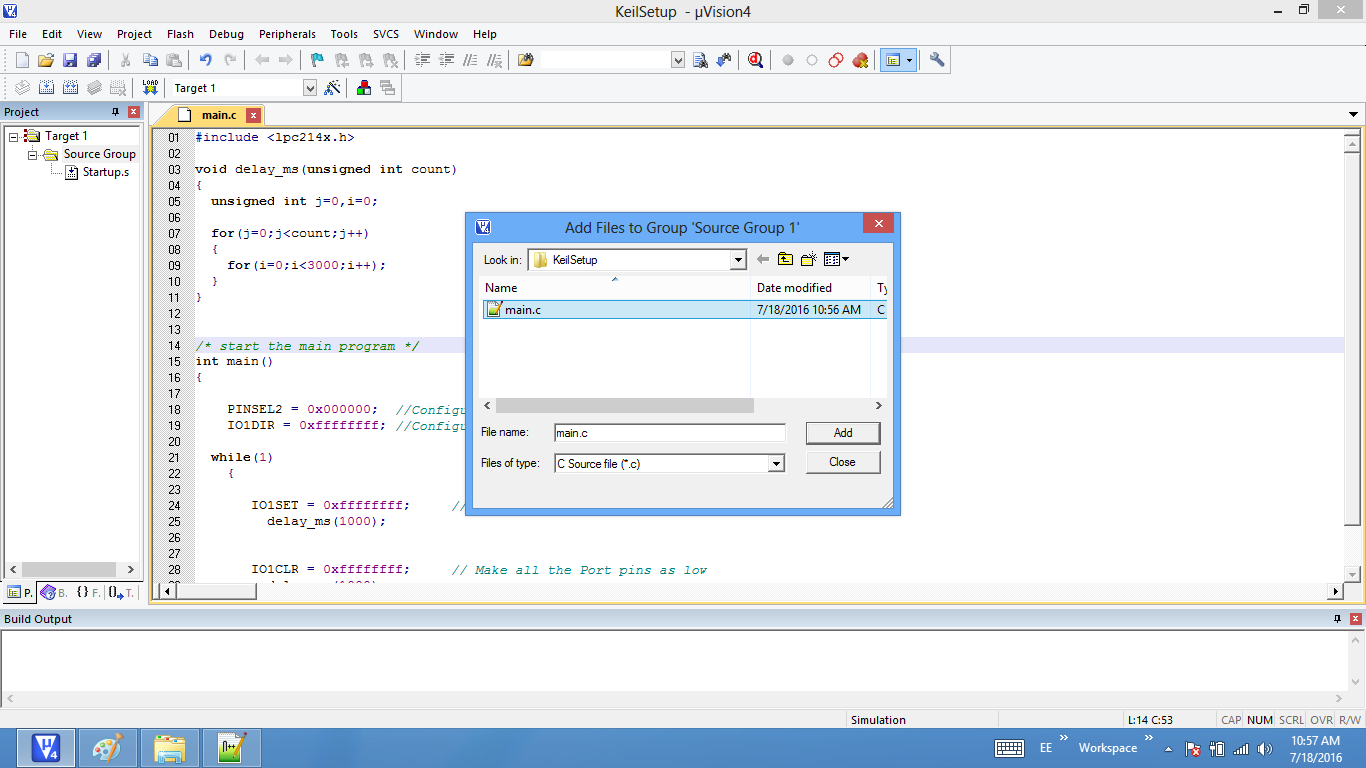
Step8: Add the recently saved file to the project.
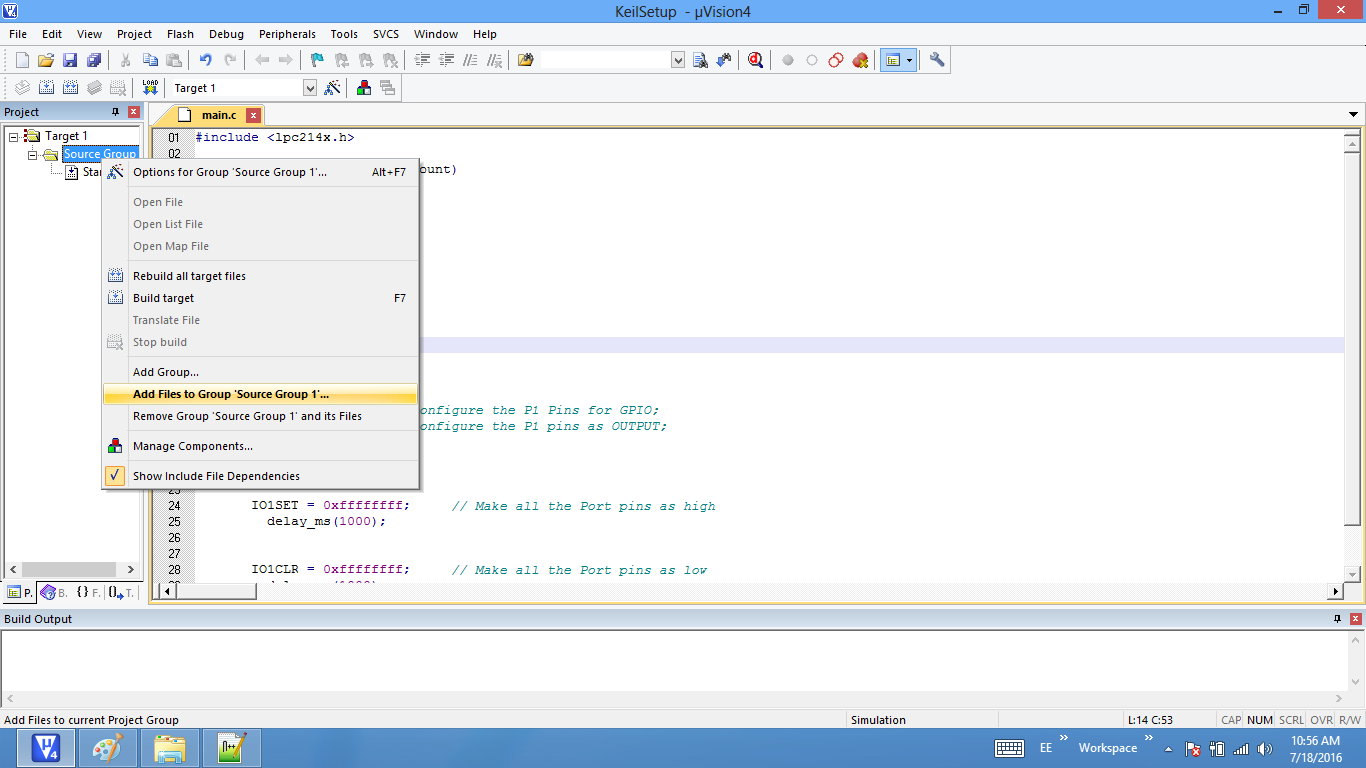
Step9: Add the main.c to the project.
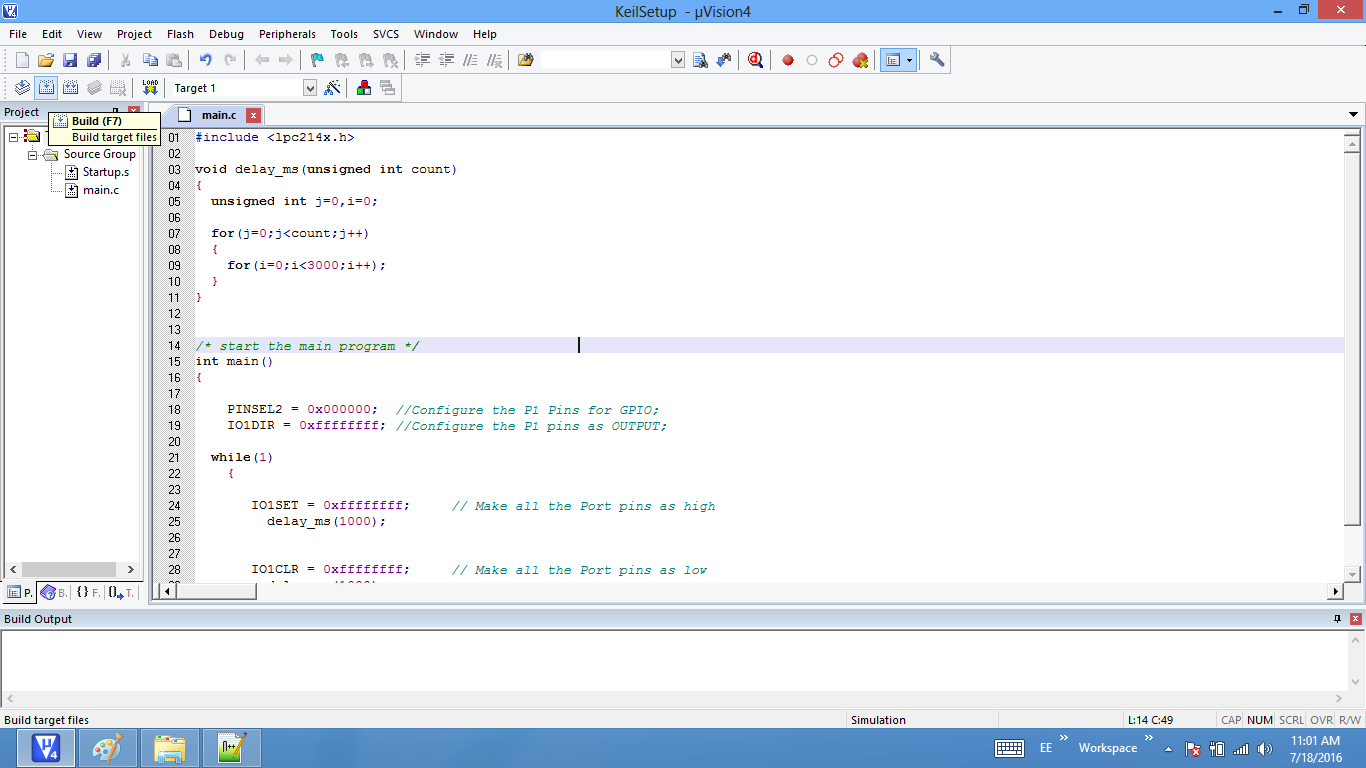
Step10: Build the project and fix the compiler errors/warnings if any.
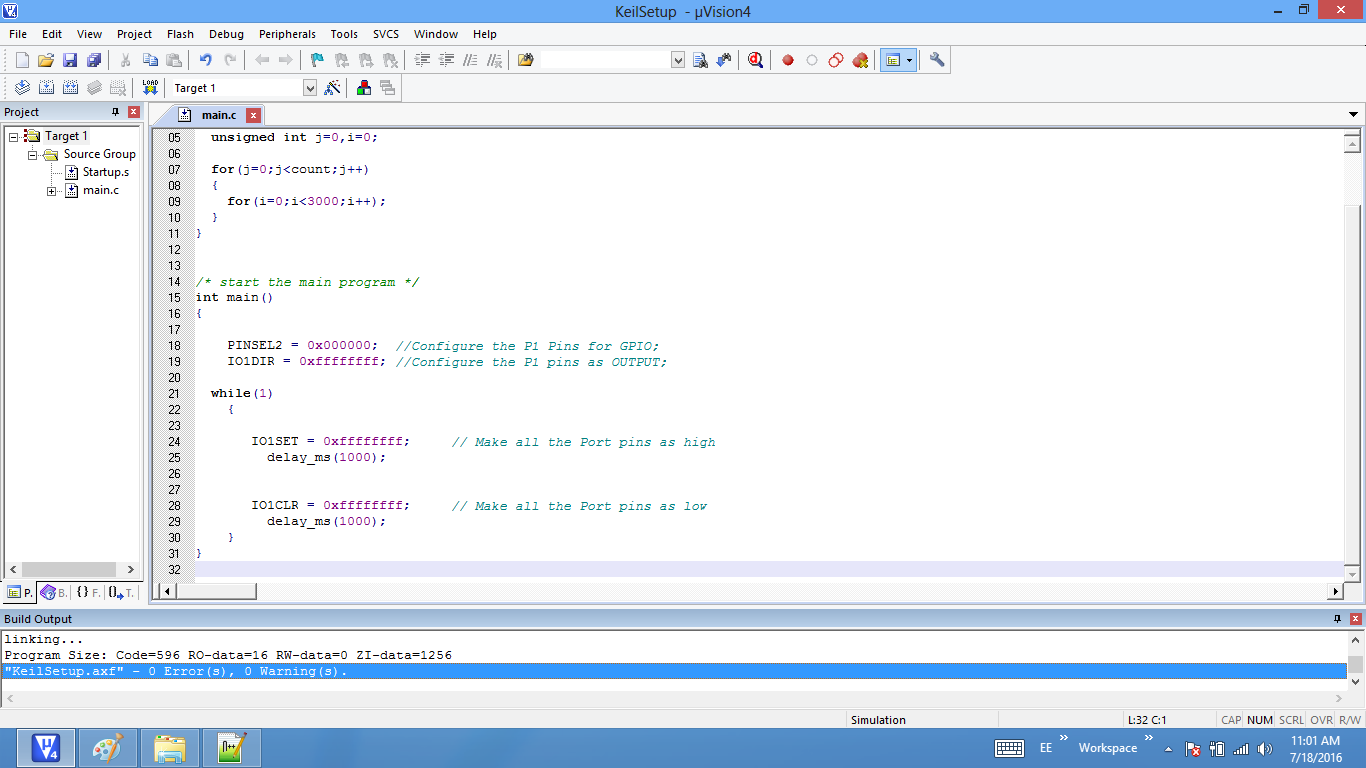
Step11: Code is compiled with no errors. The .hex file is still not generated.
Enable Hex File Generation
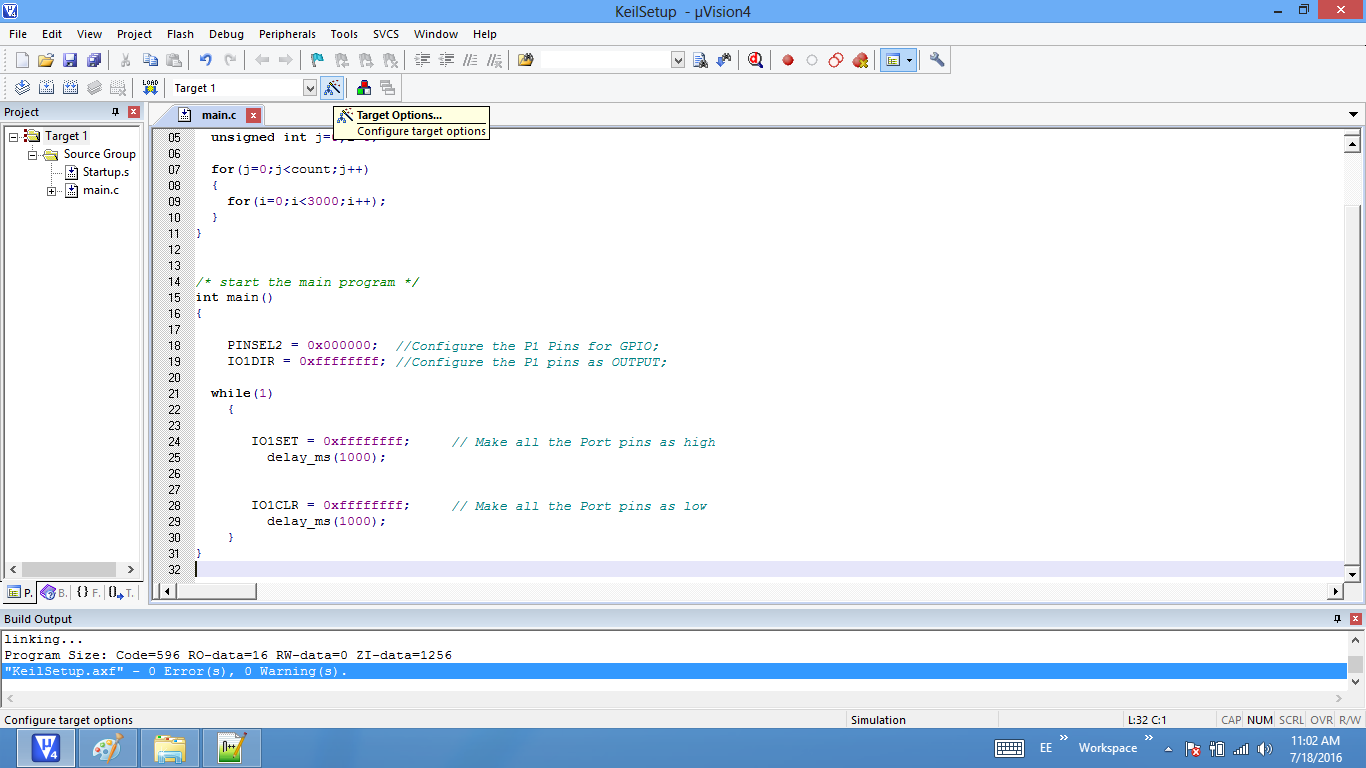
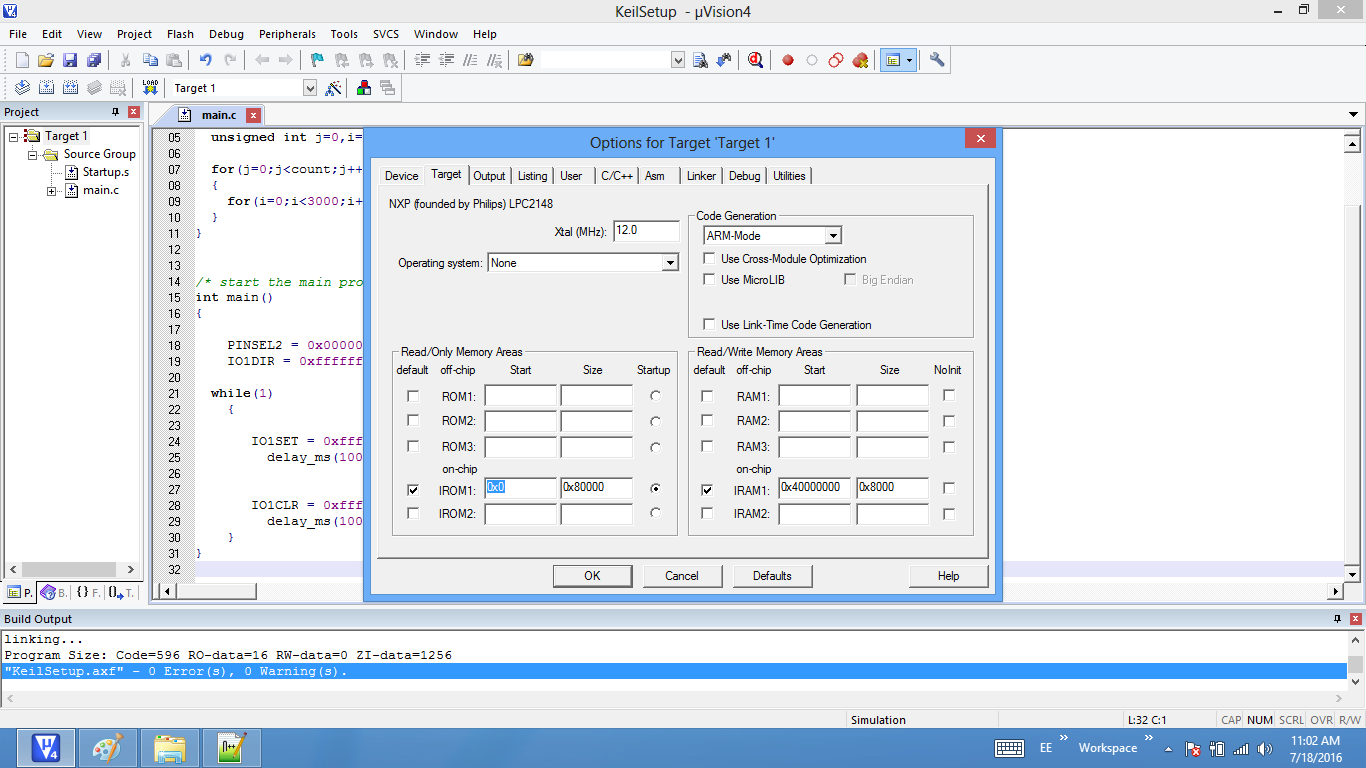
Step12: Click on Target Options to select the option for generating .hex file.
Step13: Set IROM1 start address as 0x0000.
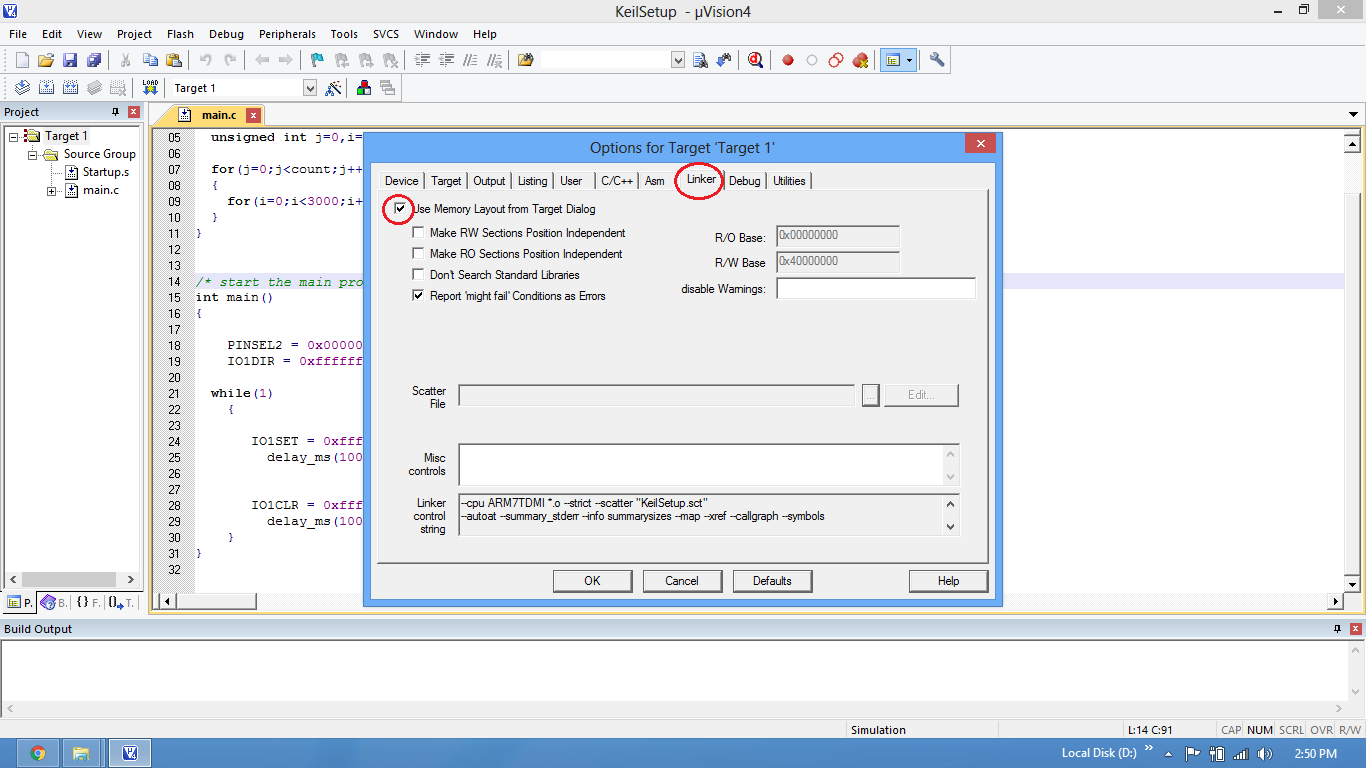
Step14:Enable the linker setting to use the IROM1 address as configured in above step.
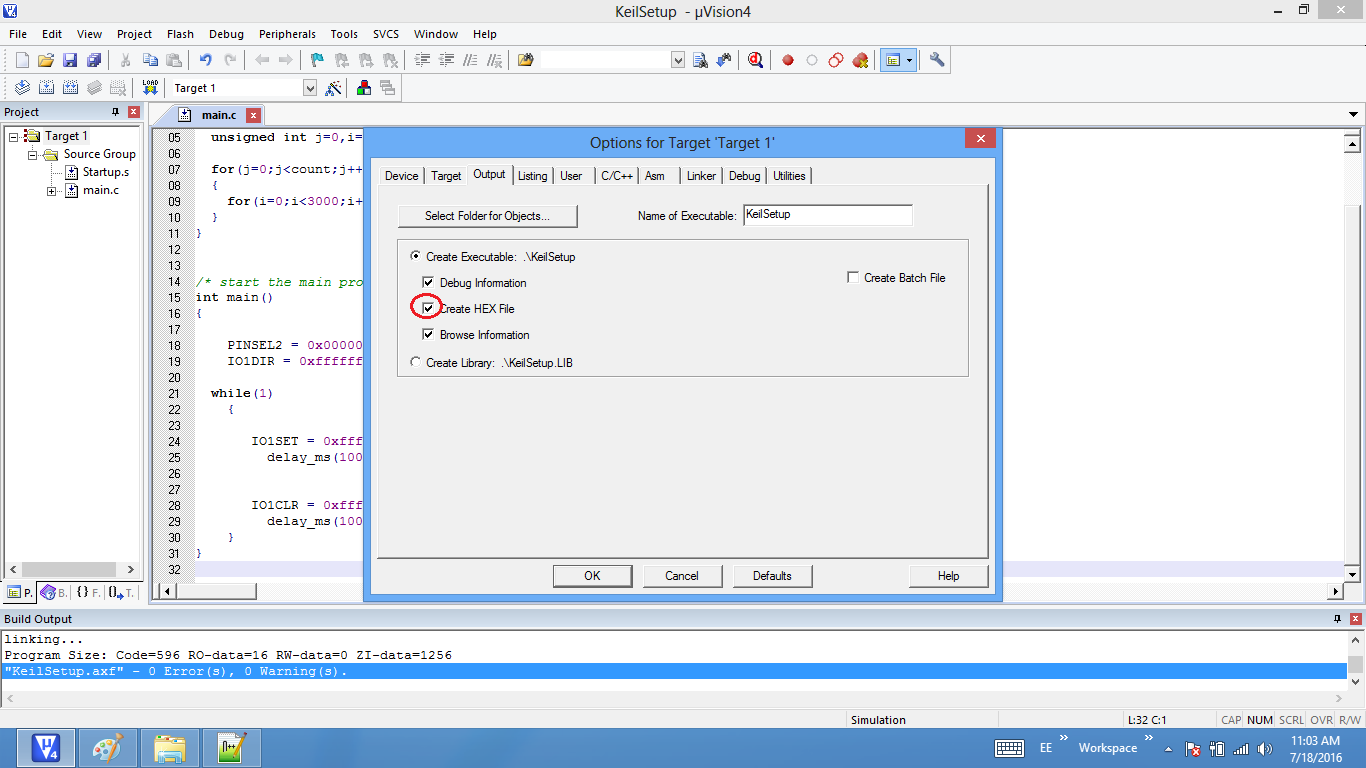
Step15: Enable the option to generate the .hex file
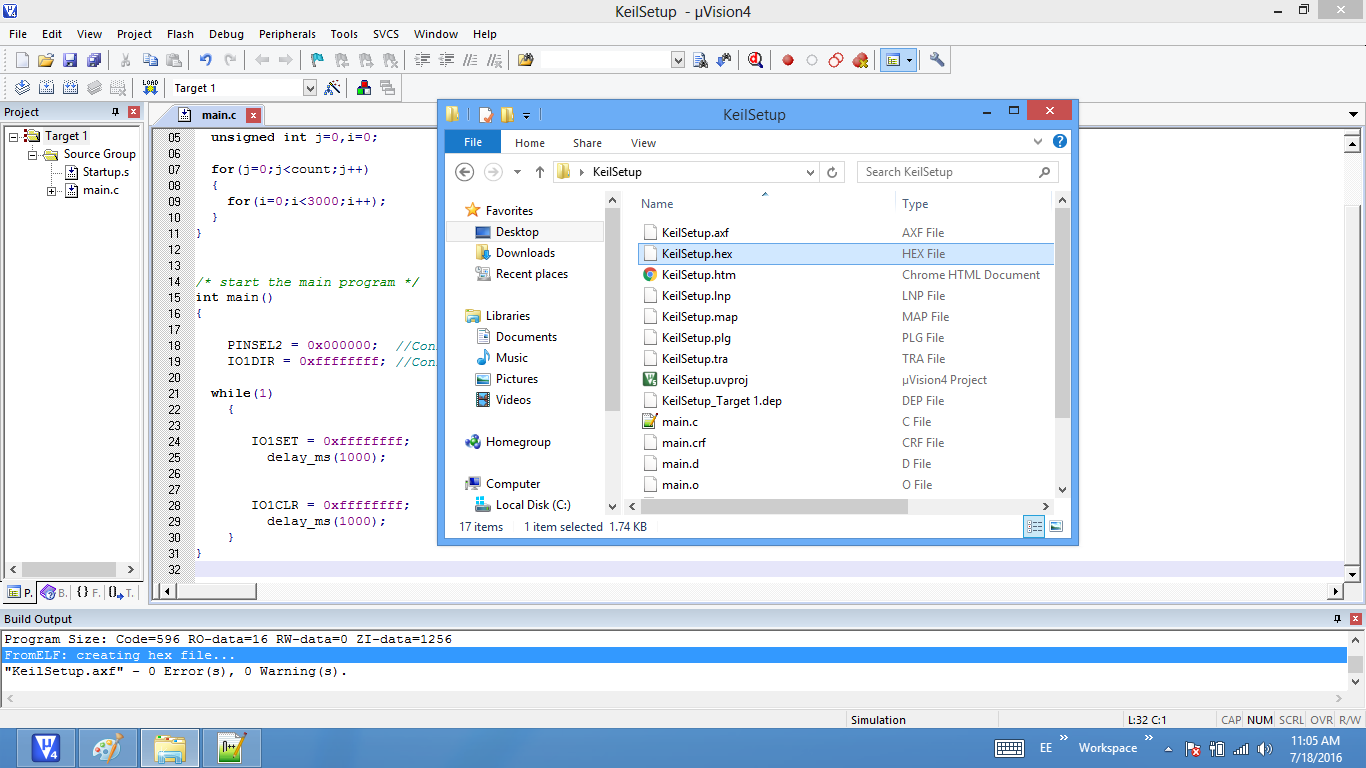
Step16: .Hex file is generated after a rebuild.
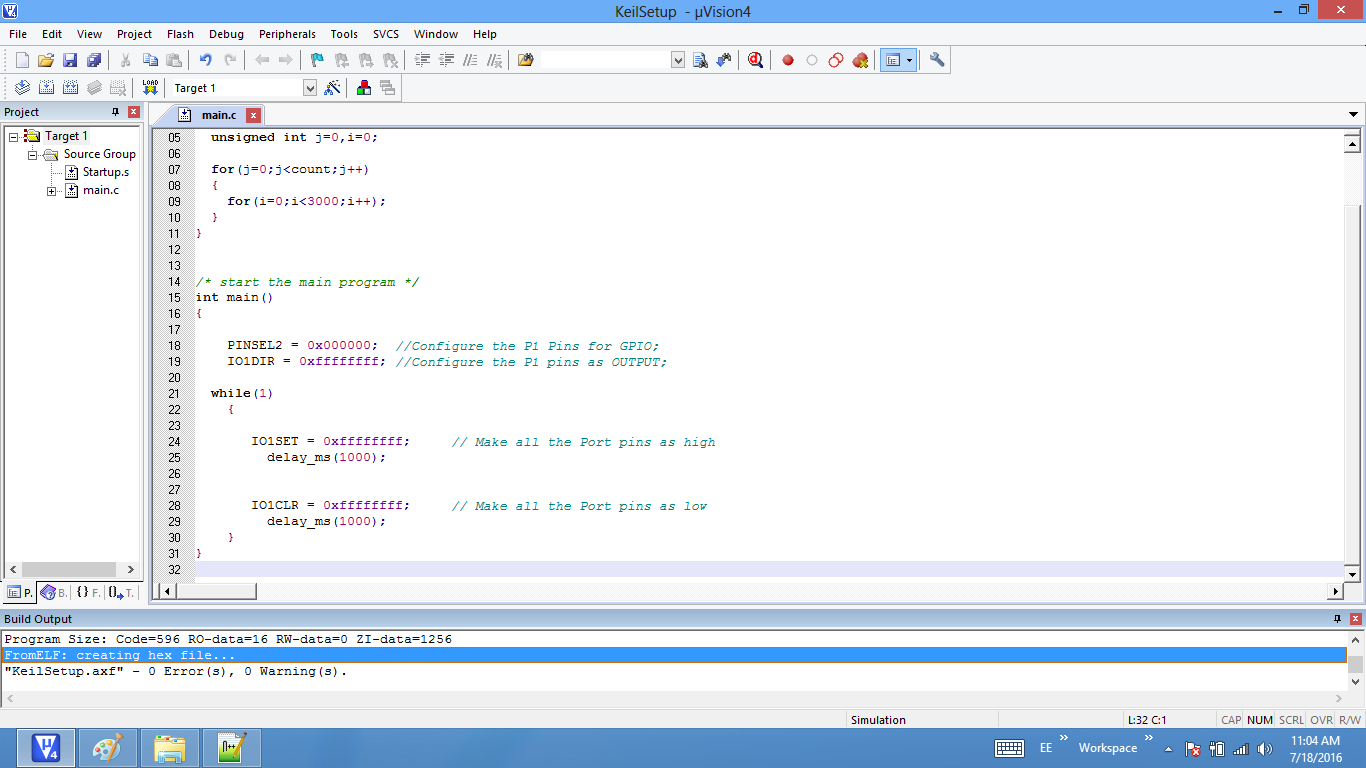
Step17: Check the project folder for the generated .hex file.
Uploading the Hex file
After generating the .hex file check this tutorial for uploading .hex files.
Downloads
Download the complete project folder from the below link:
Have an opinion, suggestion , question or feedback about the article let it out here!
