Setting Up ARM GCC And Eclipse For ExploreM3 LPC1768
In this tutorial we will see how to setup the ARM GCC with Eclipse for Explore M3(LPC1768).
Before going for eclipse we need to setup the ARM GCC environment. Please Check this link to setup ARM GCC.

Downloads
Download the latest version of Eclipse for C/C++ from this link.
Download the Led Blinking Project.
After downloading the software, extract it to some folder and run the eclipse application.
Creating Eclipse Project
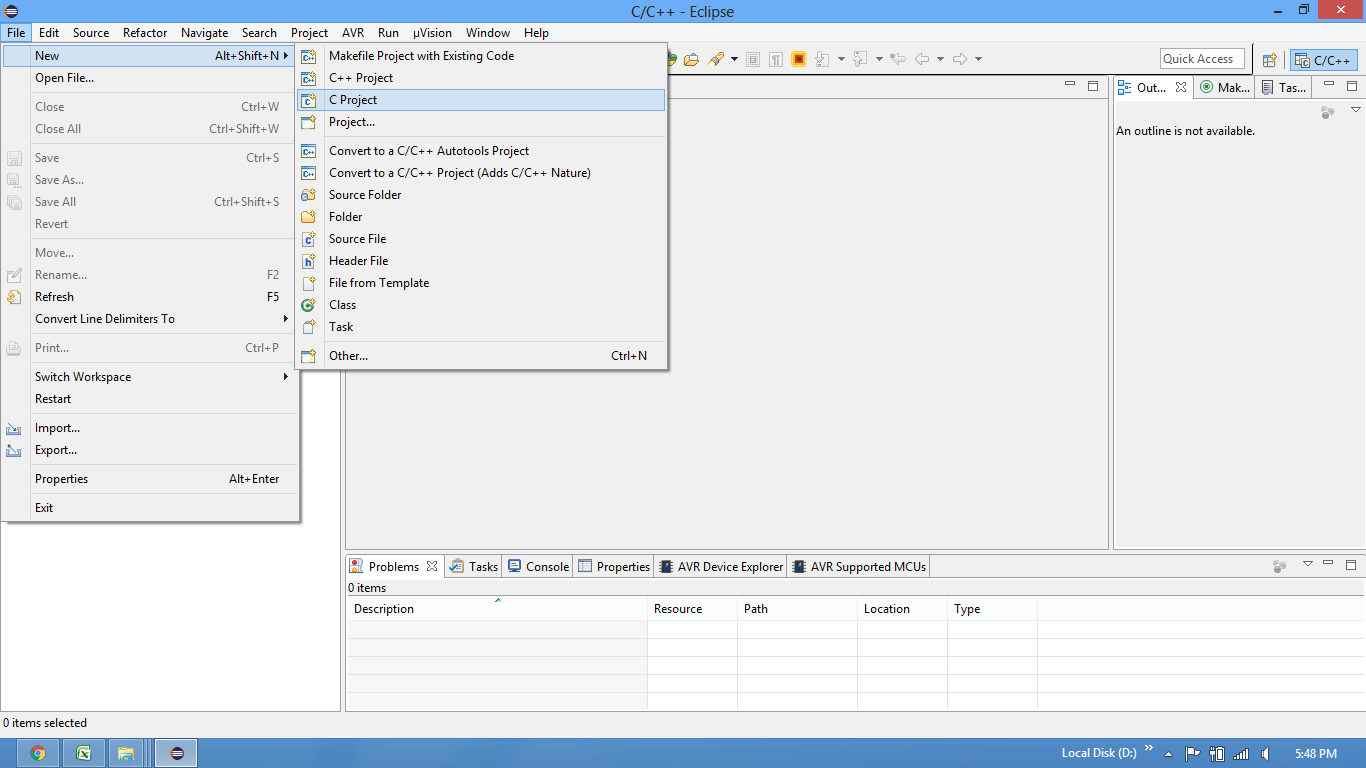
Step1:Open the eclipse software and select New -> C Project from the file menu.
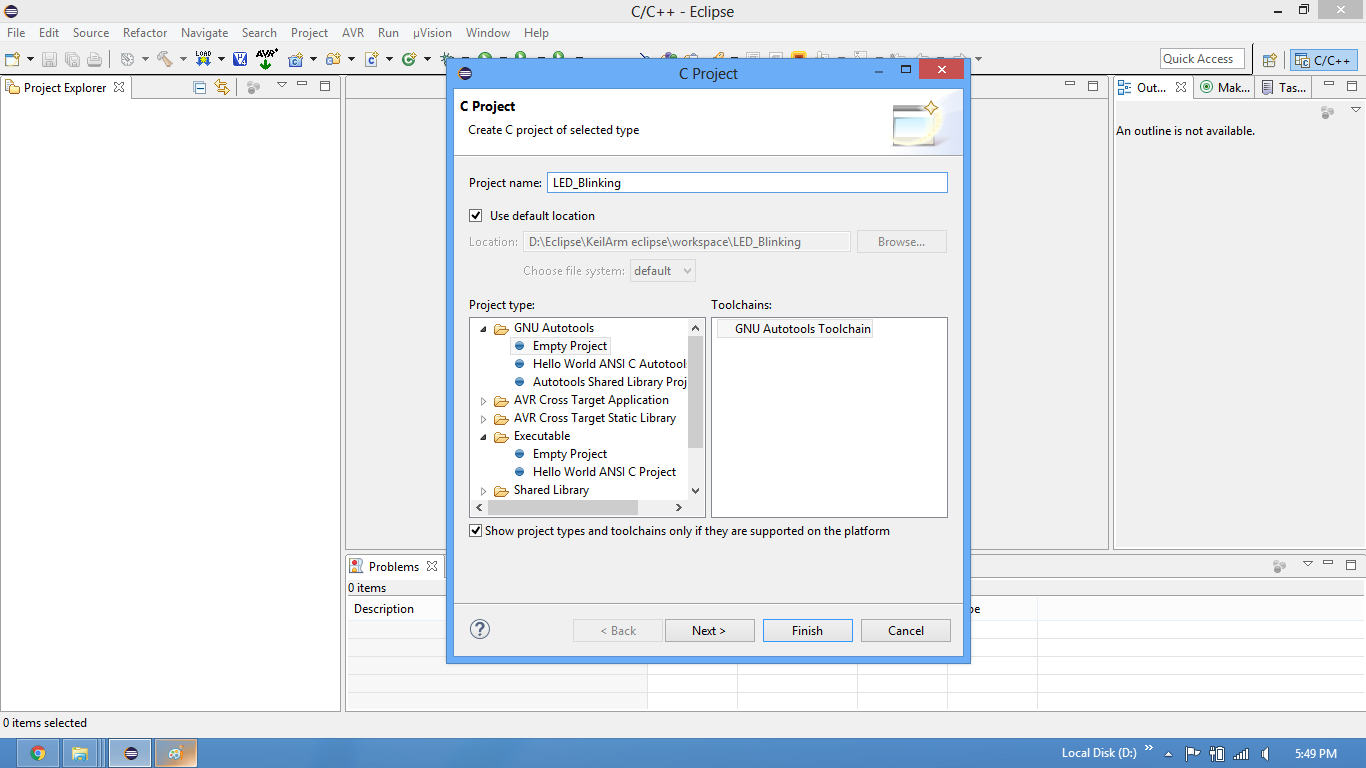
Step2:Provide the project name and select Empty Project from GNU AutoTools and click finish.
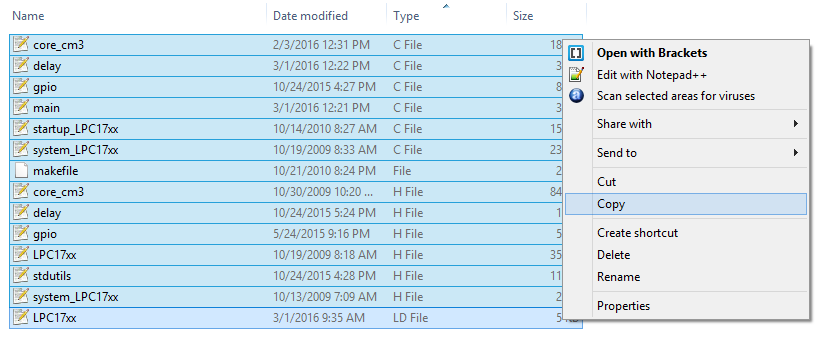
Step3:Copy the files required for the project.
Downlaod the Led Blinking Project files.
Step4:Add the files to the project.
The files can be downloaded from the below link.
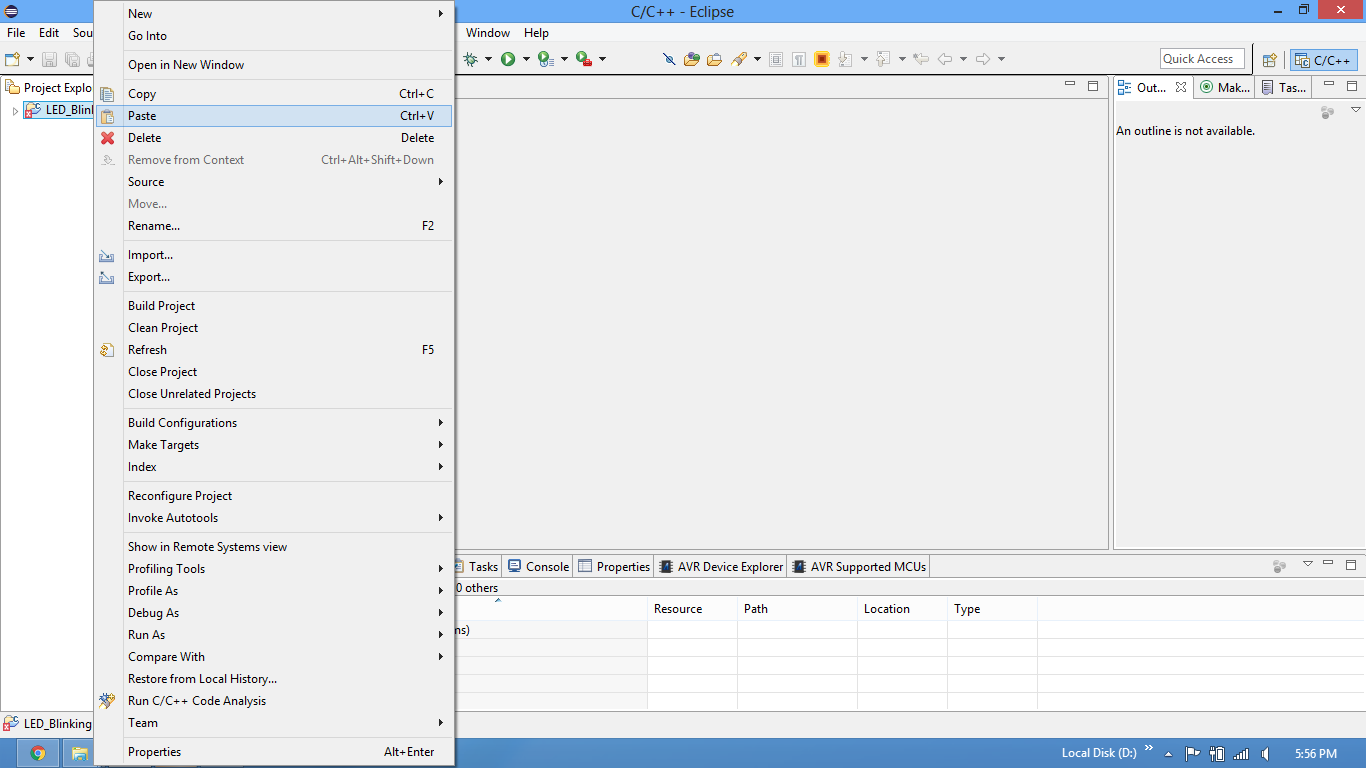
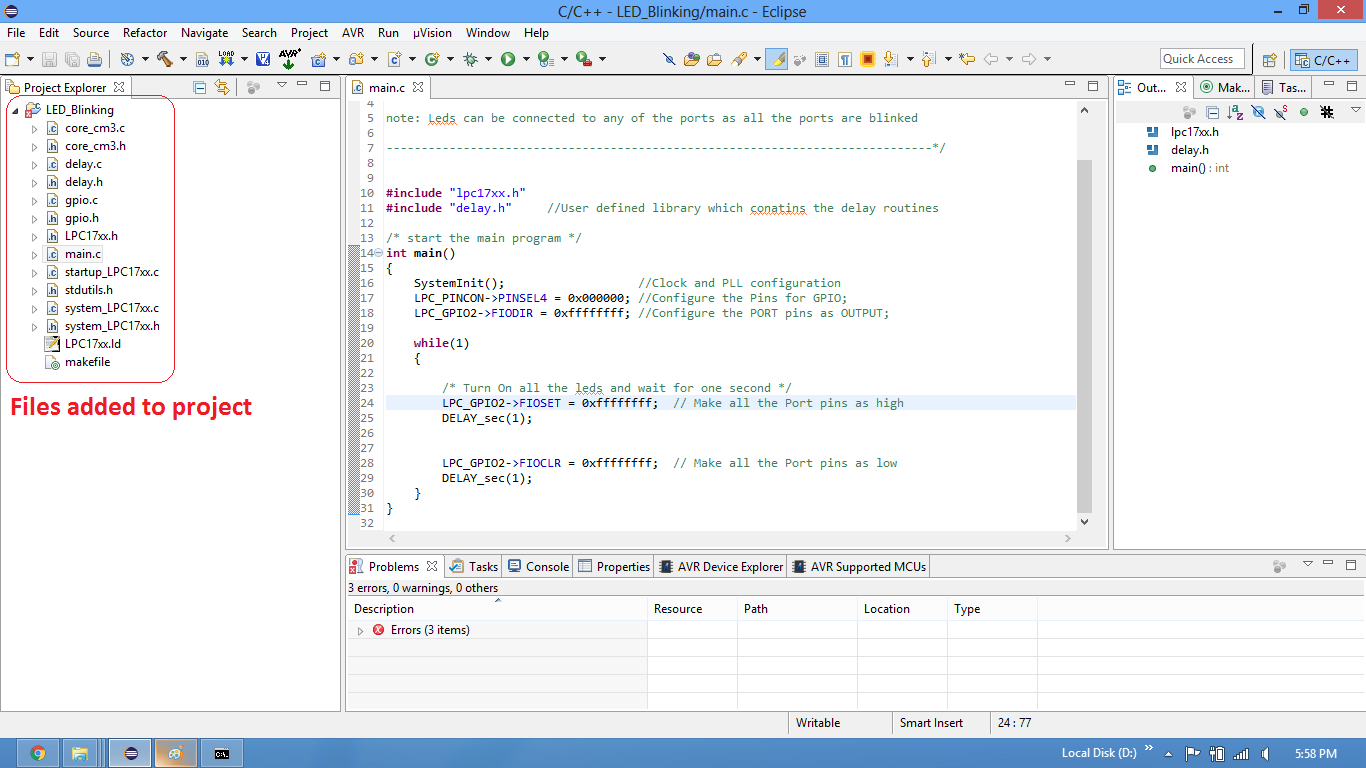
Step5:Files added to the project. makefile and linker file should be in the same folder.
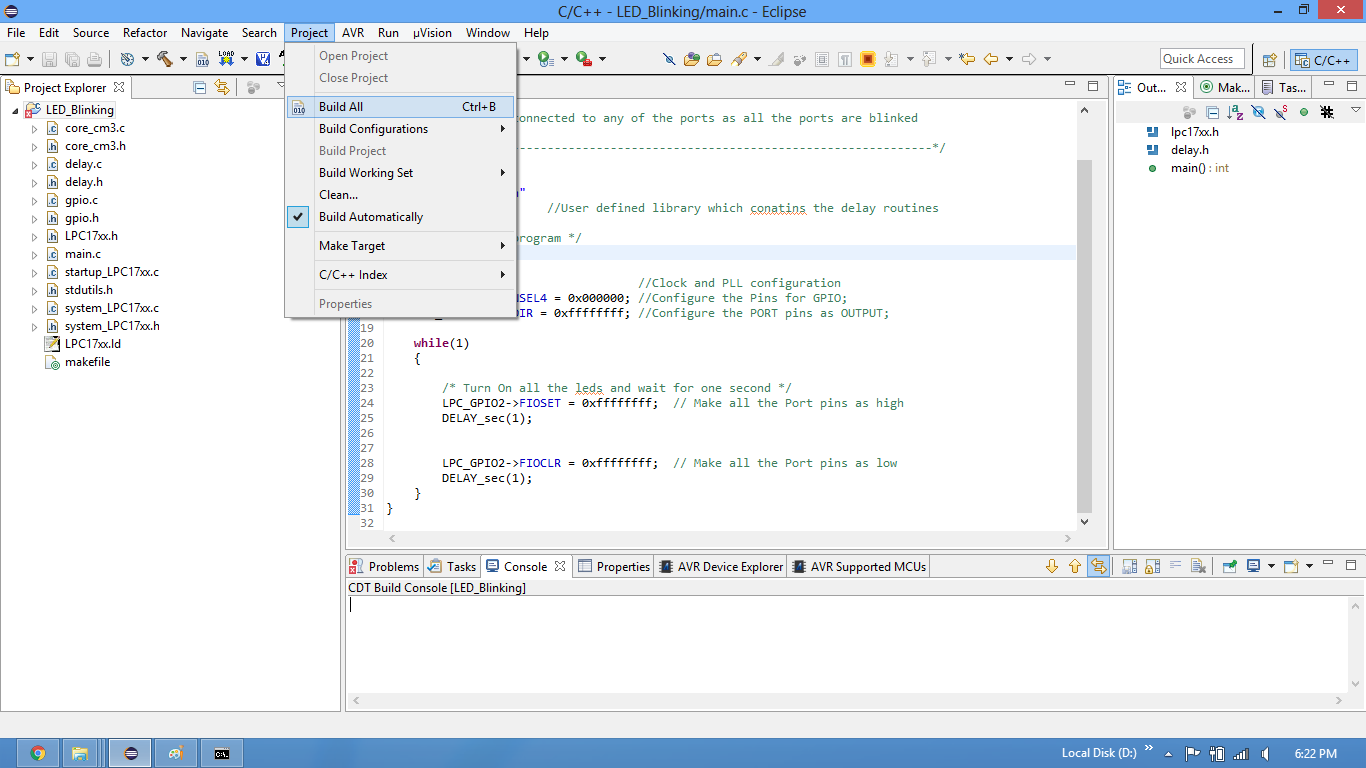
Step6:Build the project and fix compiler errors/warning if any..
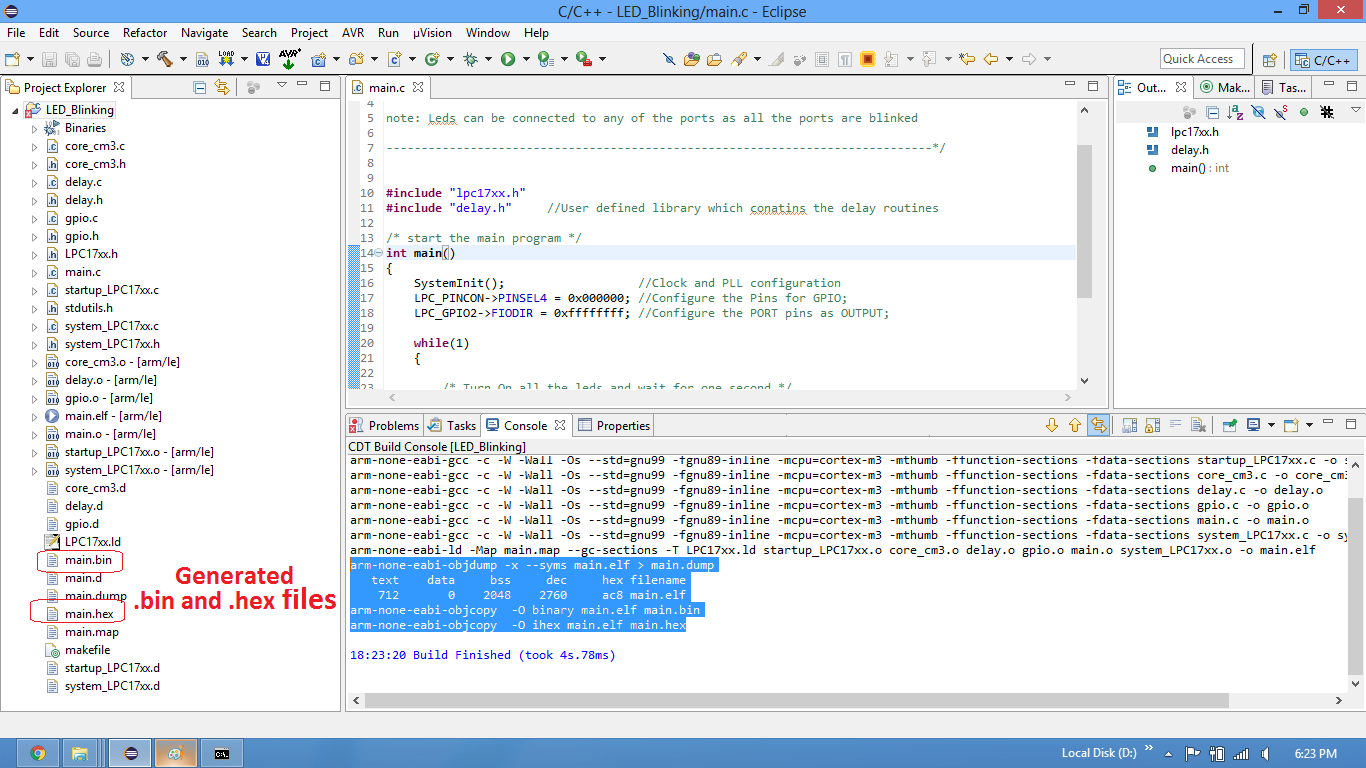
Step7:Once the project is successfully built, .bin and .hex files will be generated in the same file.
Linker Setting
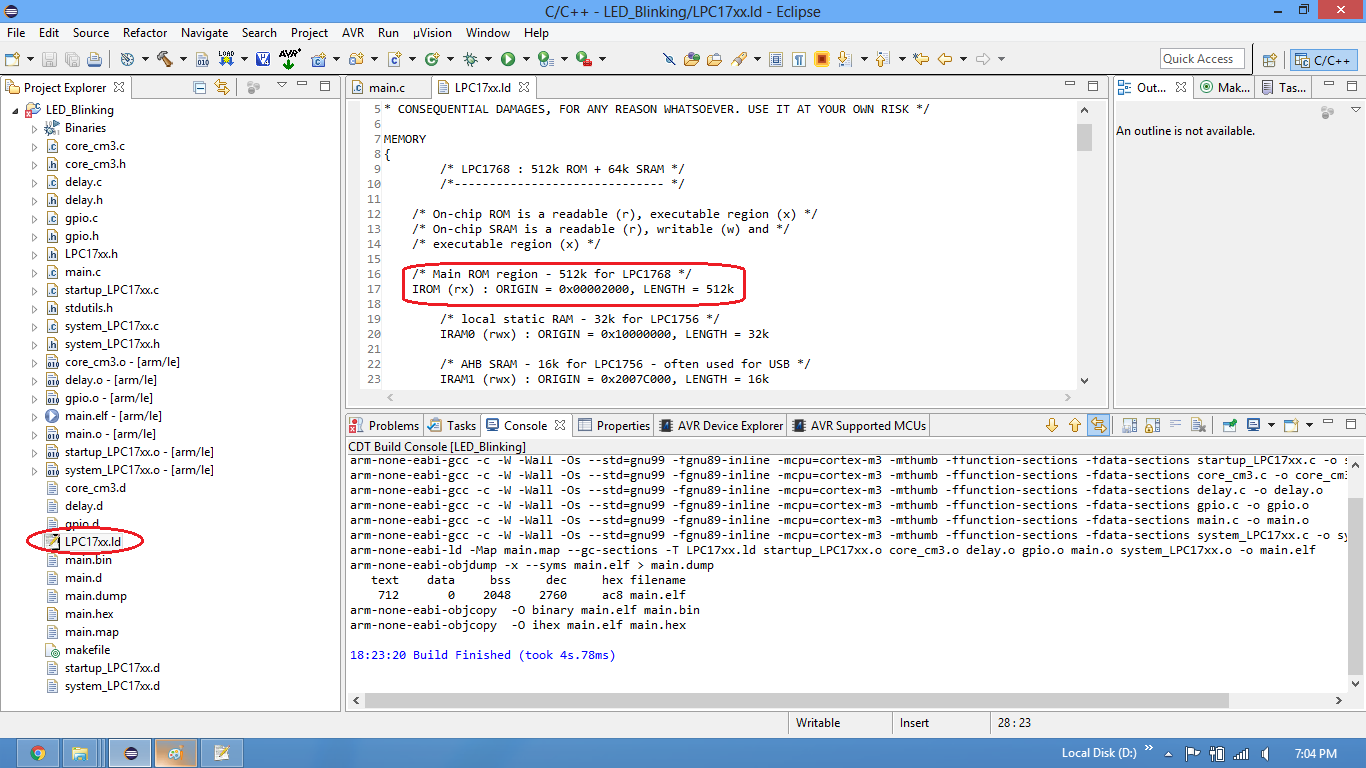
Start address of the application can be changed in the linker file as shown in the below image.
- In case your are using the .hex with flash magic then the start address should be 0x0000.
- For using the .bin file with Secondary bootloader, the start address should be 0x2000.

