Difference between revisions of "Uploading Hex File Using Ds30 Bootloader"
Raghavendra (Talk | contribs) |
Raghavendra (Talk | contribs) |
||
| Line 17: | Line 17: | ||
Step 2: The board uses DTR pin of the CP2102 USB to Serial Convertor to reset the MCU. Set it up as shown in the image below. | Step 2: The board uses DTR pin of the CP2102 USB to Serial Convertor to reset the MCU. Set it up as shown in the image below. | ||
| − | [[File: | + | [[File:DS30 loader settings.png|none]] |
Step 3: Click on the '''write''' option to flash the hex file. Once hex file is successfully uploaded status window display '''Write successfully completed'''Refer below image. | Step 3: Click on the '''write''' option to flash the hex file. Once hex file is successfully uploaded status window display '''Write successfully completed'''Refer below image. | ||
[[File:0DS30 loader successfully.png|none]] | [[File:0DS30 loader successfully.png|none]] | ||
Revision as of 17:44, 23 April 2016
We will see in this tutorial how to upload hex file using DS30 loader GUI.
Installing DS30 Loader GUI
For installing DS30 Loader GUI we need to download the below mentioned DS30 Loader GUI software.
Launching DS30 Loader GUI software
- Once we download the DS30 Loader GUI software, start the DS30 Loader GUI software by selecting Start>Programs>DS30 loader GUI .
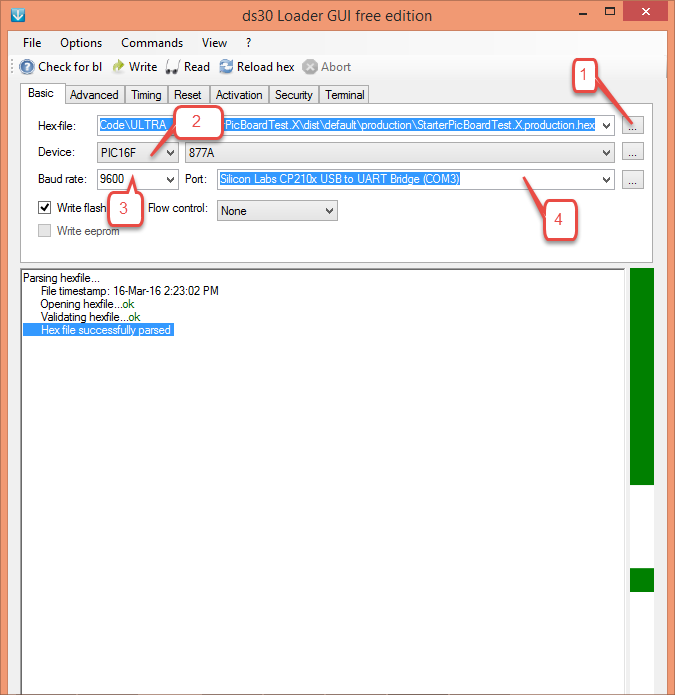
Step 1:
- Browse the hex file
- Select the appropriate MCU
- Select the baud rate as 9600
- Select the correct com port detected on your computer, when using USB to serial convertor check for exact COM port number in device manager.
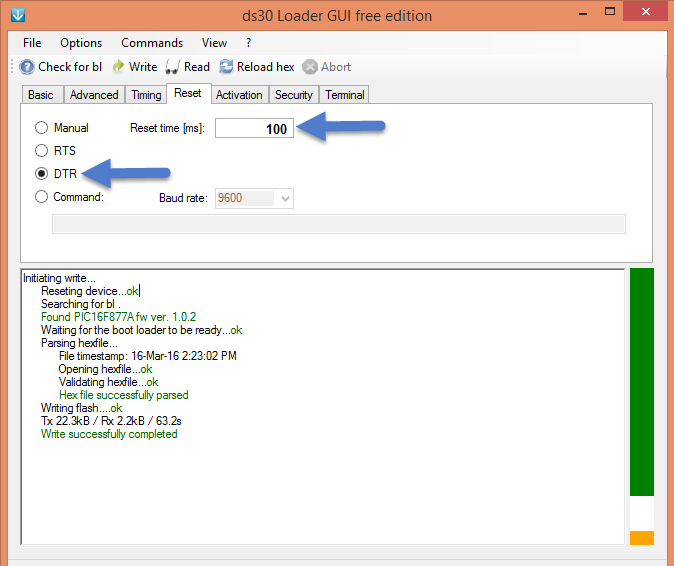
Step 2: The board uses DTR pin of the CP2102 USB to Serial Convertor to reset the MCU. Set it up as shown in the image below.
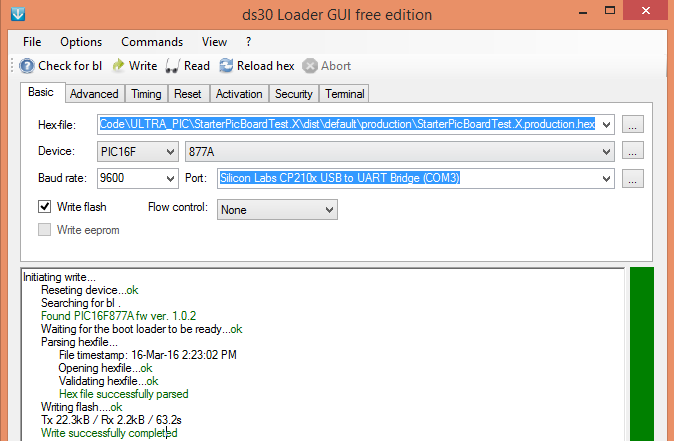
Step 3: Click on the write option to flash the hex file. Once hex file is successfully uploaded status window display Write successfully completedRefer below image.


